Report on the construction of a transport trolley for a 12" Dobsonian telescope
Dr. Achim Tegeler, 12.02.2024 – update 06.2024
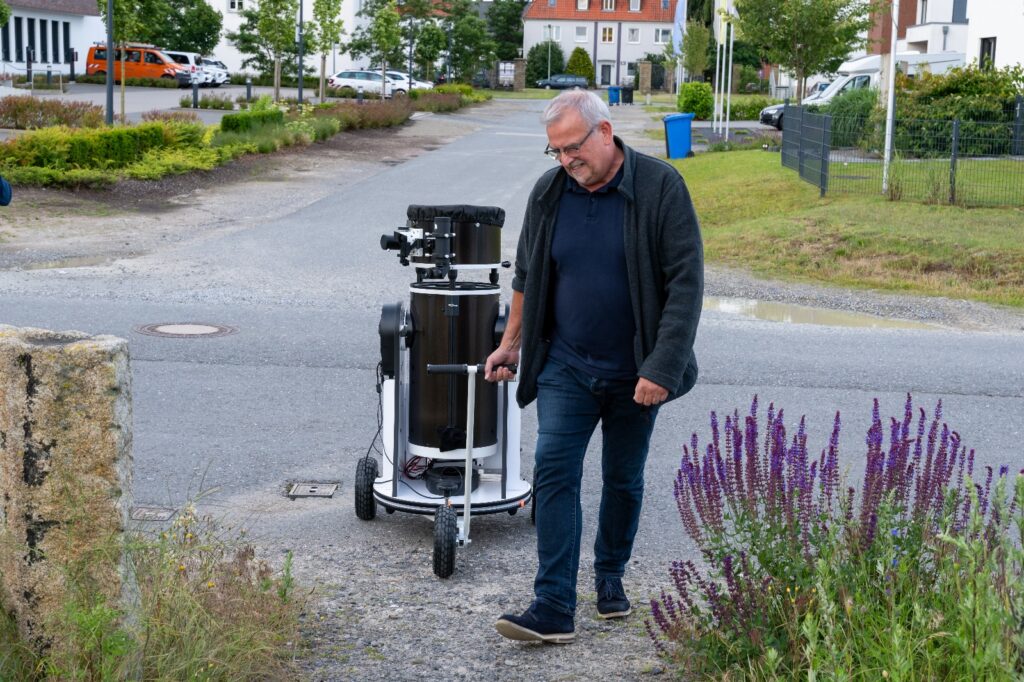
Anyone who has ever had to transport a 12" Dobsonian Goto telescope including rocker box and various additional parts such as power supply, finder telescope etc. knows that you don't necessarily want to carry the weight many meters even with two people. As one person alone, transport is only possible if you carry all the parts individually, unless you have a constitution like Chuck Norris, Arnold Schwarzenegger or Bud Spencer or live under the gravitational conditions like on the moon, which does not apply to me so far. So, a trolley is needed...
At our Sternstunden we are out and about in the city or in the district and visit different places with one or more telescopes. Of course, it's wonderful when you don't need to carry the heavier chunks, but simply pull them on wheels. So the desire grew for a transport trolley that would make the Dobsonian telescope which weighs about 40kg more mobile. The trolley should be as small and light as possible so that it is easy to transport in the car. There are such cars to buy from various manufacturers, but as always, the following applies to me: Implement your own ideas and build them yourself! Einfügen
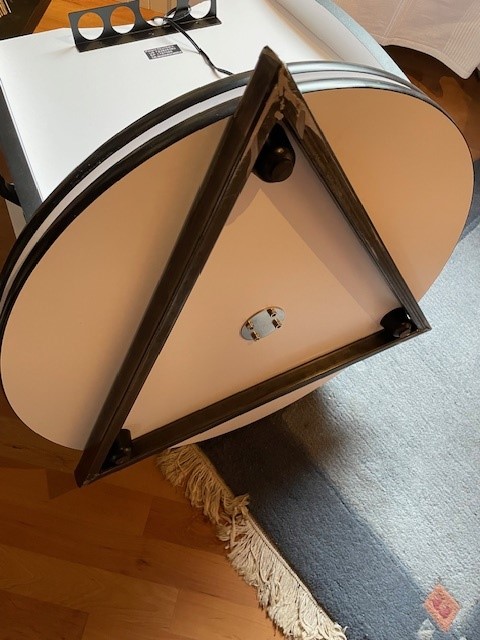
The rocker box of the Skywatcher 12" Dobsonian stands on three rubber feet, which ensure a wobble-free set-up, but also always stand in the "dirt" of the different floors or even sink in. So, the design of the cart should take into account the three feet, but prevent the feet from getting dirty. I planned square tube in 20x30mm made of steel as frame material, because steel is easy to process and weld and at the same time very stable.
For all axles, 12mm threaded rod made of stainless steel should be used. The wheels are classic "handcart" wheels with pneumatic tires.
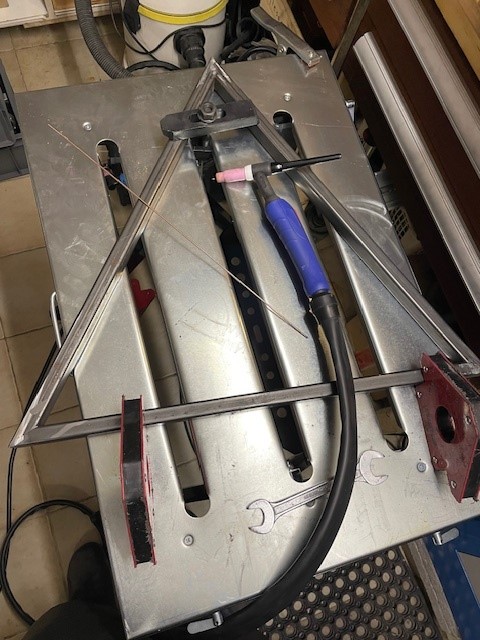
First of all, the basic frame was manufactured, into which the three rubber feet of the rocker box "engage". This is often done in a round design, but bending a square tube round is extremely difficult without a roller bending device, so I built a triangular frame here. For this purpose, the steel tubes were cut "upright" in a cold saw to 30° and then welded together, resulting in an equilateral triangle with the well-known 60° angles.


Since the mitres of saws are usually only adjustable up to 45°, a 30° precision angle block was used for adjusting the right angle. Subsequently, the parts were TIG welded.
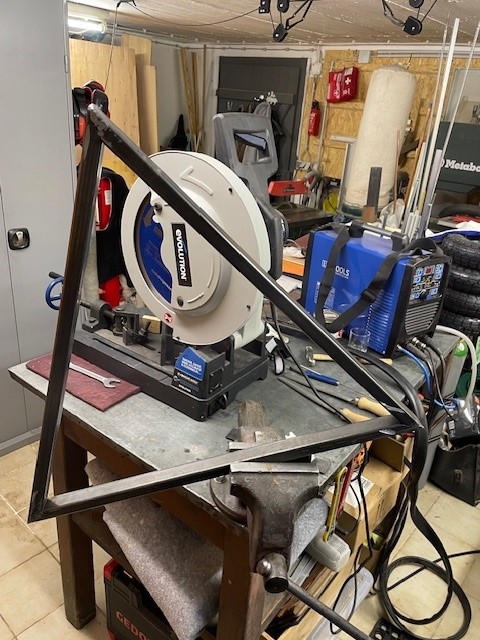
The resulting frame fits exactly around the three rubber feet of the rocker box.
Now the axle brackets for the wheels were attached. For this purpose, simply (12mm) drilled pieces of the square tubes were welded on, so that the axles can be held in them.

In addition, the entire trolley, including the rocker box, should not stand on its wheels during the observation, but on solid supports, which should also serve to bring the whole thing into balance. For this reason, two more booms were welded next to the axle brackets in order to be able to screw in the corresponding supports. The screw-in function was realized by a 12mm nut welded to the underside, which is supposed to hold a threaded rod, which is then screwed against the floor.
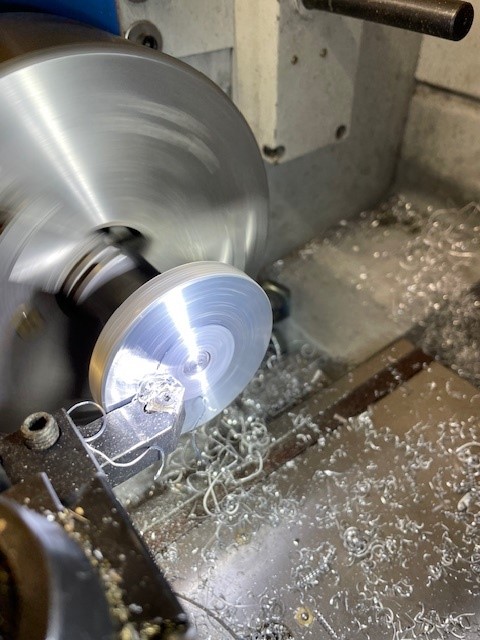
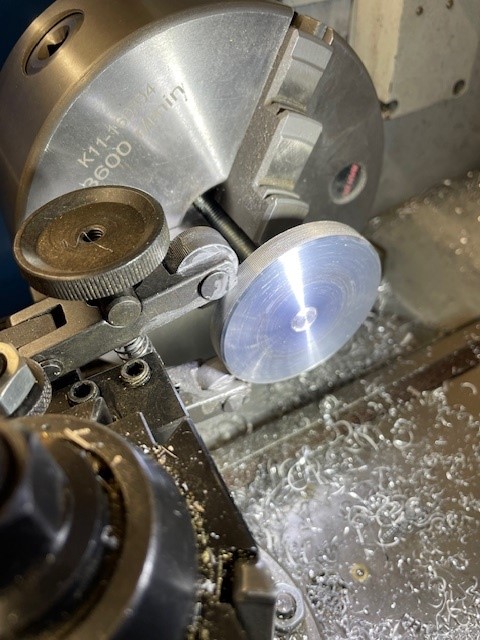
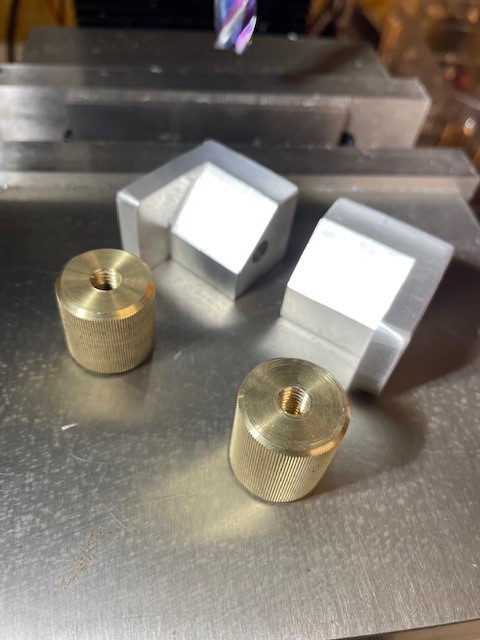
Since the entire trolley should rest as stably as possible on three of these supports, the threaded rods in the nuts must be countered. For this purpose, counter discs made of aluminium were turned and provided with a 12mm thread. For better grip, the counter discs were knurled on the outside, because the "jacking up" of the whole thing should be possible without tools.
This is what the supports look like with a corresponding knob handle.

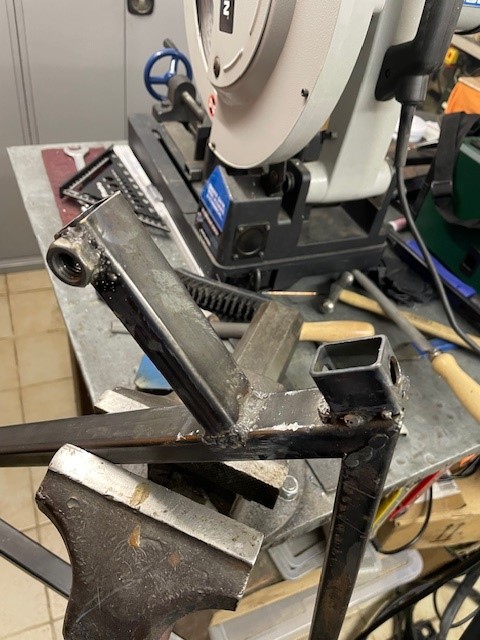
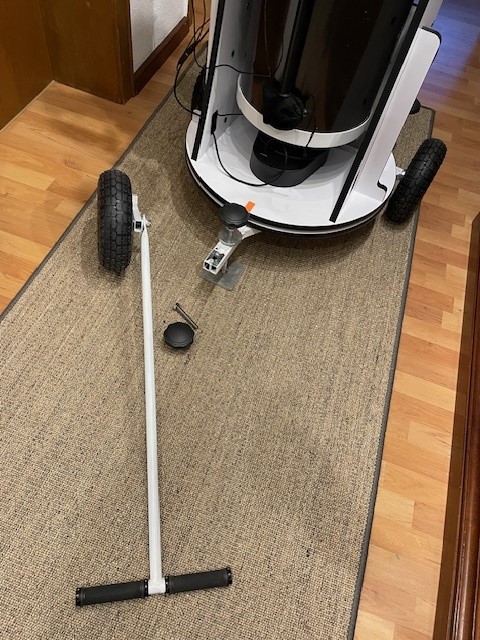
The steerable front wheel should be removed during observation with the telescope so that the wheel and drawbar are as far away as possible and do not become a tripping hazard in the dark. Therefore, a construction had to be found that could be quickly and easily attached and removed.
I opted for a somewhat unconventional, transverse fork that grips over a welded-on drawbar. The manoeuvrability of the car is certainly no longer optimal, because the pivot point of the fork is not above the wheel, but this way will allow a small and compact trolley.

Now that the wheels, supports and steering were realized, the only thing missing was the secure and quickly detachable attachment of the rocker box to the triangular frame, so that there is no risk of the telescope and rocker box falling off the trolley during transport, even over cobblestones and curbs.
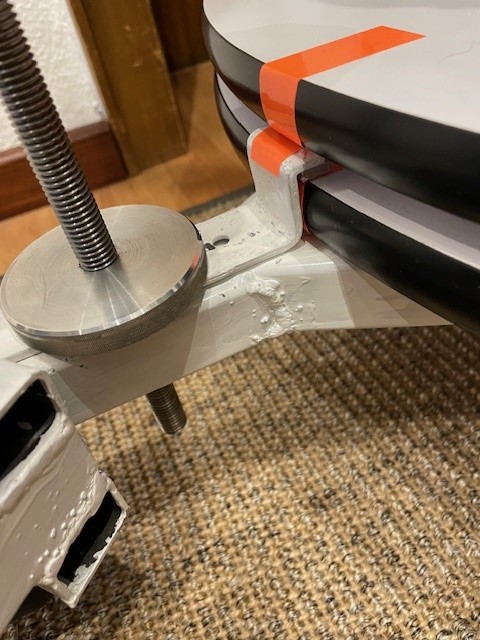
I didn't want to change the rocker box irreversibly under any circumstances, so drilling holes into the rocker box was out of the question. Instead, I developed a hook construction that clamps the base plate of the rocker box against the frame construction in three places.
To ensure that there were no scratches on the underside of the rocker box when measuring and testing, small felt stickers were used as spacers on the steel struts, which are later (after painting) exchanged for larger felt pads of the same thickness.
Two of the hooks should be rotatable and screwable at the back of the cart. The swivel hooks were milled from aluminium and screwed on with a brass knurled screw. For this purpose, an M6 screw was passed through the square tube from below.

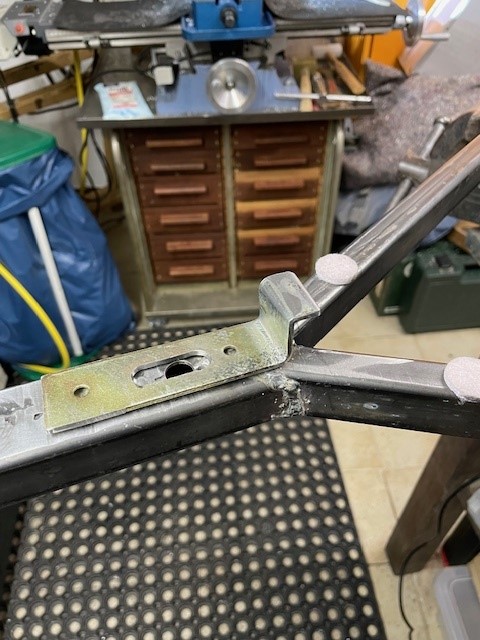
The third hook should be realized as a latch on the drawbar of the trolley and simply held by the counter nut of the support screw. The latch was bent from a single piece of galvanized steel of a construction angle and provided with a slotted hole for the support screw.
The pull handle with the pull rod was made of 22mm round steel tube. To do this, one end of the tube was simply pressed flat, welded and drilled through so that it could be screwed to the axle of the front wheel.
At the end of the handle there is a corresponding piece of round tube welded crosswise and equipped with bicycle handles, so that there are not quite so cold fingers when pulling in the cold.
To ensure that the rubber foot engages into the angle on the drawbar at the right place when the rocker box is placed on the trolley, the position of the foot was marked with coloured adhesive tape on the base plate.
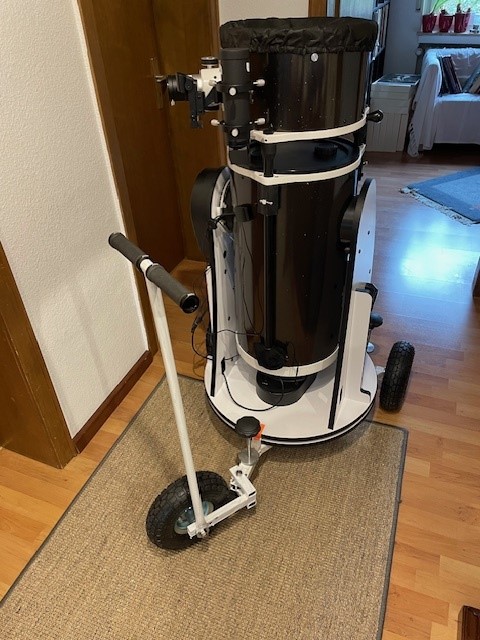
The whole thing was then painted white and will hopefully serve the desired purpose. The use in our "Sternstunden" will show it...
Update from June 16th 2024
The Dobson carrier is perfect for moving the big Dobson telescope: